Sending for signing a new envelope
From the home dashboard page, click the "New" dropdown to start sending a new document for signing :

You have available the following options :
-
Send a document : choose this to send a document (or a collection or documents grouped in a envelope) for signing by multiple recipients.
-
Sign a document : choose this option if you want to sign a document. See also self sign
Click the first option to continue the sending process (by clicking "Send a new document or envelope" you are creating a draft)
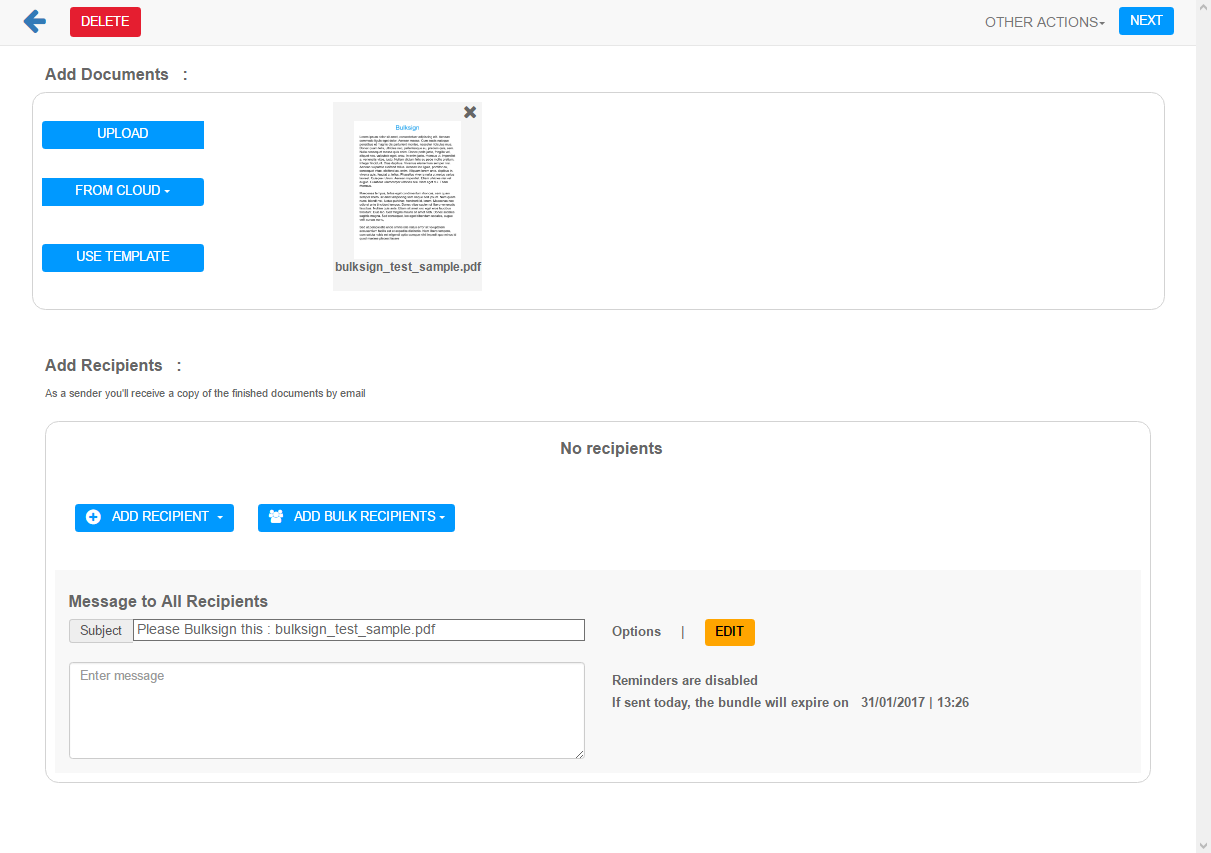
Adding recipients and documents
In the first step of the sending process, you'll have the following options :

Adding Documents
-
Upload : upload a document to sign directly from your computer.
-
From Cloud : get a document to sign from one of the supported cloud providers : Dropbox, Box or OneDrive.
-
From Template : use a existing template and import the list of files and recipients from that template into the current draft.
Adding Recipients
Please also see the recipients section.
Depending on the type of envelope you want , either click "Add Recipient" or "Add Bulk Recipient". Recipients can be added from 3 sources :
-
Direct : add the recipient details directly.
-
Self : add yourself as a recipient.
-
Contact List : select the recipient from the contacts list.
-
CSV file : import a csv file with multiple recipients (this is only for bulk envelope).
Checking the "Concurret Mode" checkbox will enable concurreny mode
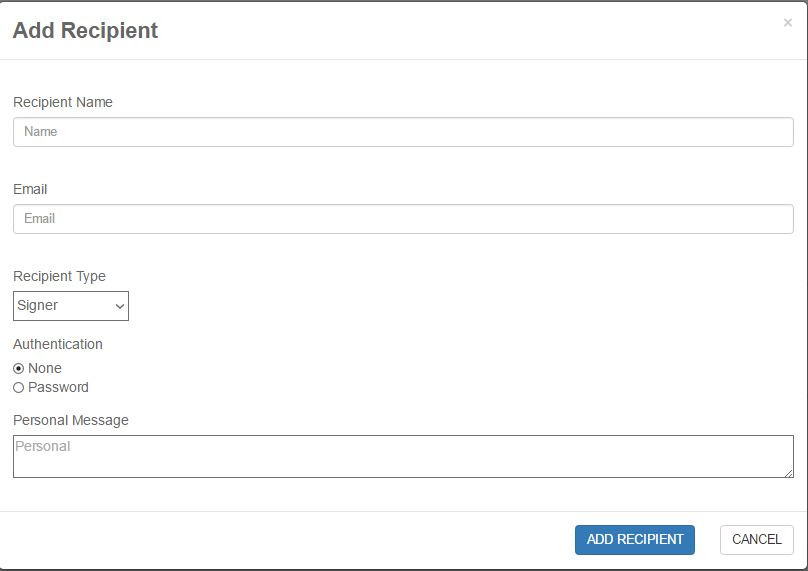
Recipient information
Here is the information required for each recipient:

-
Name : he recipient's full name.
-
Email address : the recipient's email address (make sure is spelled correctly because the sign notification is sent by email).
-
Recipient Type : the type of the recipient. See also this for more details
-
Recipient Authorization : add specific authorization for recipient. See also this for more details
-
Personal Message : add a personal message specific for the current recipient.
Draft Options
Please see this this section
Assigning Signature Fields
After adding the recipients, click Next to assign signature fields for recipients.
Depending on the number of recipients, when the "assign fields" page" is opened, the following options are available :
-
for a single recipient, all form fields found in the document will be assigned to that recipient.
-
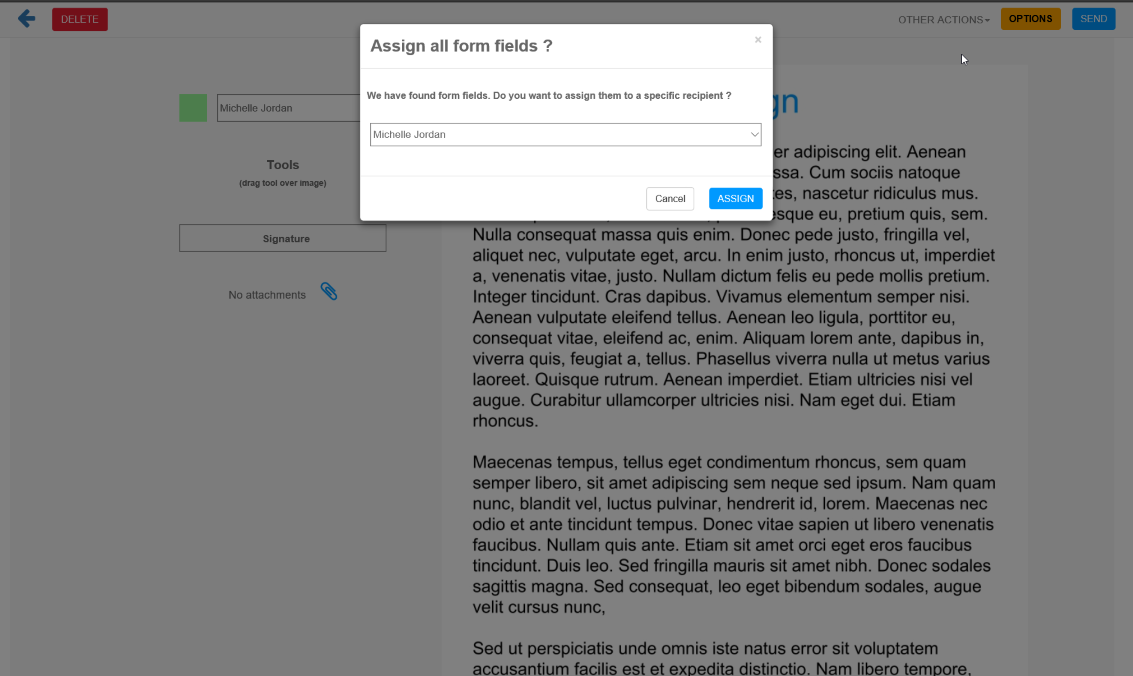
if there are multiple recipients, the following dialog will pop up :
 This will allow the user to assign all form fields to a specific recipient. If the user doesn't want to do the assignment (and prefers to the assignment manually, he can click "Cancel").
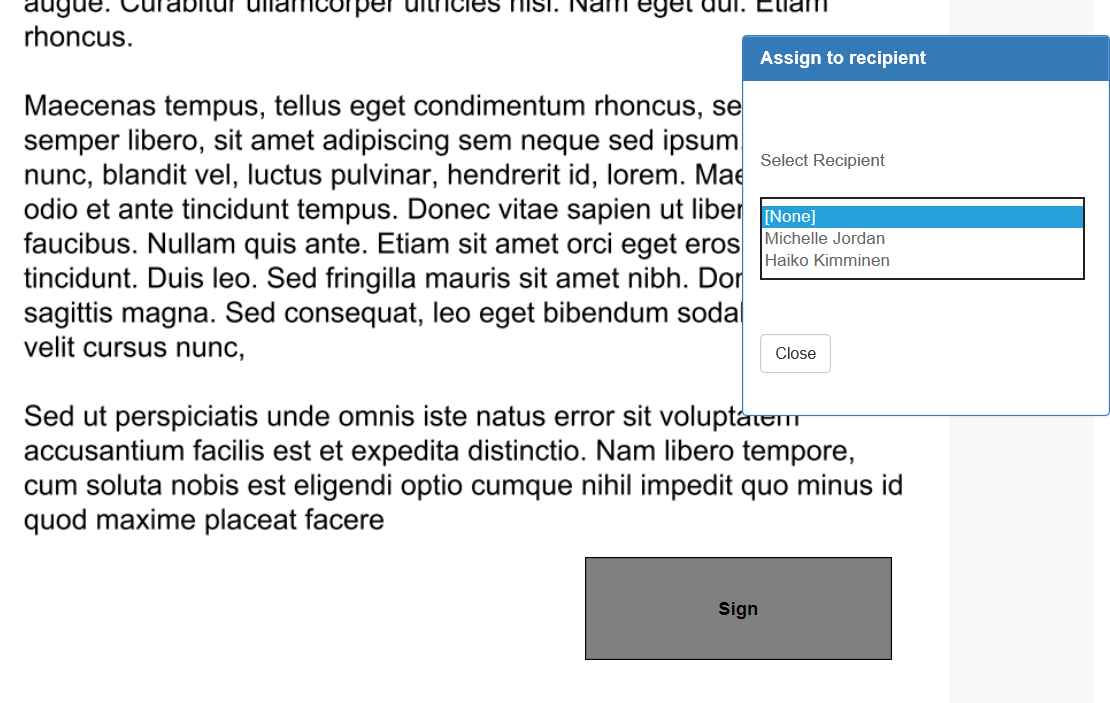
Manual field assignment
Clicking on any of the document fields will show a popup that allows the user to manually assign the fields to a specific recipient

Note : all signer recipients must have at least 1 signature field assigned before the envelope can be sent for signing.
If all the recipient data is correct, click the "Send" button in top right corner top to send the documents for signing.