Install instructions
-Prepare database
SqlServer
- Create an empty database on your SqlServer instance. We recommend, for security purpose, to create a new user in SQL Server and only give him access to the Bulksign database. The login user MUST have rights to alter the database schema.
PostgreSQL
-
Create an empty database on your PostgreSQL instance.
-
run these queries to create a new collation (second query is needed for proper casing)
CREATE COLLATION SQL_Latin1_General_CP1_CI_AS (
  provider = 'icu',
  locale = '@colStrength=secondary',
  deterministic = false
)

update pg_collation set collname='SQL_Latin1_General_CP1_CI_AS'
where collname='sql_latin1_general_cp1_ci_as'
-
Unzip the downloaded bulksign.zip file,for example,in "c:\bulksigninstall\"
-
Edit c:\bulksigninstall\settings\settings.json, search "DatabaseConnectionString" and edit the DB connection string :
-
Replace the connection string placeholders with the correct data and save the file.
{ServerName} - the SQL Server name
{Bulksign} - the database name
{Name} - the user name with which to connect to the database
{Password} - the password
-
if you are using PostgreSql, edit also "DatabaseType" and replace "SqlServer" with "PostgreSql"
-
If you want to install in another path other the default, please edit "settings.ini" and change the default installation paths
[all]
SettingsInstallationPath=C:\Program Files\Bulksign\
DashboardInstallationPath=C:\Program Files\Bulksign\WebDashboard\
SignInstallationPath=C:\Program Files\Bulksign\WebSign\
ApiInstallationPath=C:\Program Files\Bulksign\WebApi\
ServiceInstallationPath=C:\Program Files\Bulksign\BackgroundService\
Post installation if you need/want to create a default organization with specific users or apply a production license, this can be done with the BulksignCLI tools, please see the documentation here
-
Open a powershell command line as administrator (open cmd.exe and type powershell (or pwsh if you are using PSCore))
-
Navigate to the folder where you unzipped bulksign.zip
-
Run .\install_pre.ps1 to install the pre-requirements. This will install the VC++ and NET redistributable.
-
Run .\install.ps1 to start the Bulksign installation process
-
Bulksign will be installed in the following path c:\Program Files\Bulksign and the default browser will be opened pointing at the new installation
-
If the settings.ini data was not filled, please follow the on-screen instructions to obtain a evaluation license and start using Bulksign
Update instructions
-
We recommend to backup the existing Bulksign database AND current files
-
Unzip the downloaded bulksign_v.x.x.zip somewhere on your hard drive,for example,in "c:\bulksigninstall\"
-
go to the root folder of your current Bulksign installation folder (usuall c:\Program Files\Bulksign) . From there copy "settings.ini" and overwrite the same file from the root of the newly created installation folder.
-
Open a powershell command line as administrator (open cmd.exe and type powershell)
-
Navigate to the folder where you unzipped bulksign.zip and run .\update.ps1
-
type "update" to start of the update process
Troubleshooting
Q: What can I do if the installation script fails for some reason ?
If the installation fails (because of invalid settings or permissions), you can run ".\remove.ps1" to clean up, fix the permissions and re-run install.ps1
Q: I get this when trying to run Bulksign after installation ?
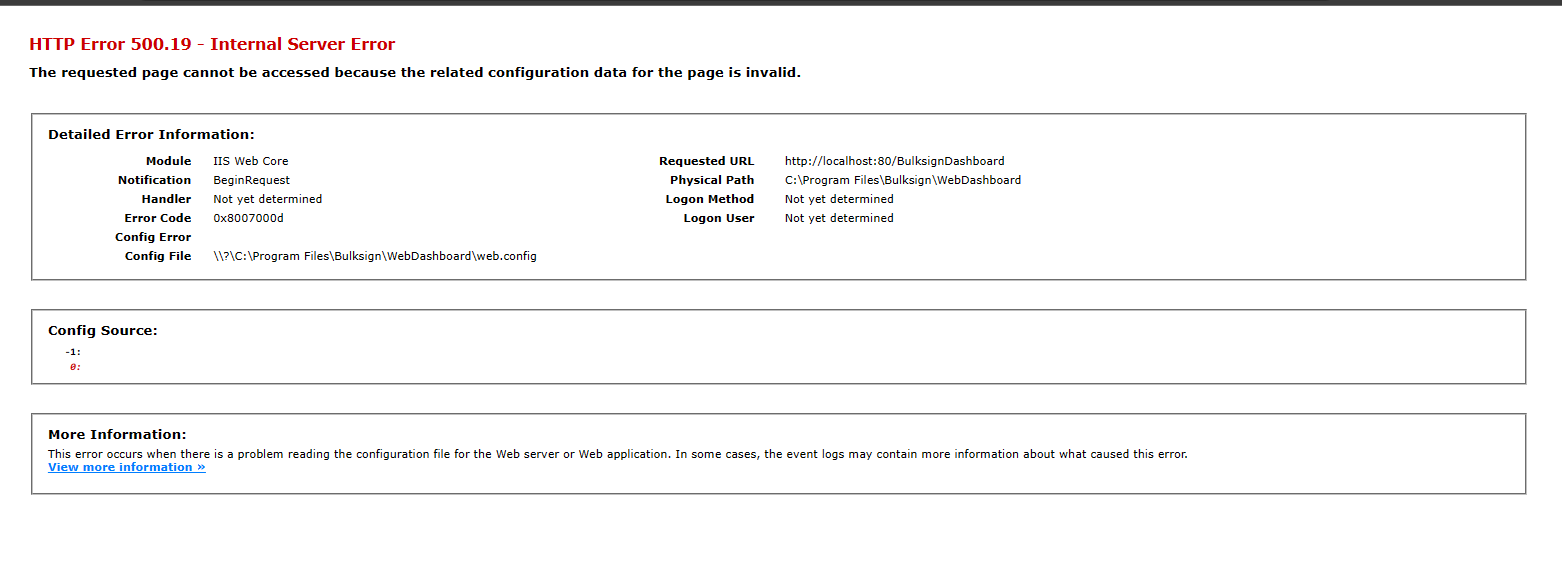
To fix this, please run .\install_pre.ps1. The error happens because the NET redistributable is NOT installed.